
2026-09-15T03:13:01+00:00September 15, 2026|Tags: LED Display Knowledge|
2026-09-15T03:12:34+00:00September 8, 2026|Tags: LED Display Knowledge|
2026-08-26T07:15:38+00:00August 26, 2026|
Choose an LED display by matching the installation environment, closest viewing distance, content, and total project budget. Shortlist suitable pixel pitches, calculate native resolution, then verify brightness, camera performance, service access, and controller compatibility before requesting comparable quotations. The lowest screen price can become expensive once installation, electricity, and repairs are included. This LED display buying guide gives commercial buyers a practical selection process, comparison tables, and worked calculations. It covers direct-view modular video walls, rather than LCD televisions with LED backlights. Use the examples to prepare your requirements, then confirm the final specification through a site survey and demonstration.
Table of Contents
1. What Is an LED Display?
1.1 How a modular screen works
A direct-view LED display forms images with light-emitting pixels on modules. Modules fit into cabinets, and multiple cabinets connect to create the required screen area. A controller maps the video signal to those pixels. This modular approach lets buyers specify a wall that fits the room, stage, or advertising structure.
The term here refers to a direct-view video wall. A television marketed as an LED TV usually uses an LCD panel with an LED backlight, so its specifications should not be compared as if it were the same product.
1.2 Common commercial applications
| Project | Screen category to evaluate | Priority checks |
|---|---|---|
| Meeting room or control room | Fine-pitch indoor wall | Small-text readability, low-brightness image quality, service access |
| Retail window | Indoor high-brightness or transparent system | Sun exposure, reflections, transparency, content contrast |
| Outdoor advertising | Outdoor fixed installation | Daylight visibility, enclosure protection, structural design |
| Concert or exhibition | Rental cabinets | Weight, locks, edge protection, rigging, camera testing |
| Sports venue | Scoreboard, main screen, or perimeter system | Viewing angles, scoring integration, impact protection where needed |
“Rental” describes cabinet construction and intended use; it does not mean you cannot purchase the equipment. Compare rental screen options if you frequently rebuild stages. For a permanent room installation, evaluate indoor fixed screens and their maintenance clearances.
Buyer takeaway: Choose an LED display category around the operating environment and service model before comparing individual products.
2. Why Choose an LED Display Instead of a Projector or TV?
2.1 Compare the complete viewing system
A modular LED display is worth evaluating when a large, continuous image or a custom screen size matters. Projection can suit controlled-light environments and installations with a suitable throw path. A professional LCD screen may be a simpler purchase for a smaller room where a standard size meets the brief.
| Buying factor | Direct-view LED wall | Projector or LCD alternative |
|---|---|---|
| Physical size | Built from a cabinet matrix; verify achievable dimensions | Projection depends on optics and surface; LCD uses fixed panel sizes |
| Room lighting | Choose calibrated brightness for the actual location | Projection needs contrast assessment; LCD needs reflection and brightness checks |
| Installation | Requires support, power distribution, control, and service access | Projection needs mounting and an optical path; LCD needs suitable mounting |
| Maintenance | Replaceable parts vary by cabinet and module design | Service scope varies by display or projector model |
| Cost comparison | Include processor, installation, commissioning, and spares | Include mounts, projection surface where relevant, installation, and support |
2.2 Make the decision with real content
Compare your smallest text, typical video, and presentation layouts at the intended viewing distance. An LED display should earn its additional installation complexity through a clear operational benefit. Do not assume it is automatically the most economical option for every room.
3. Indoor vs Outdoor LED Displays
3.1 Indoor installations
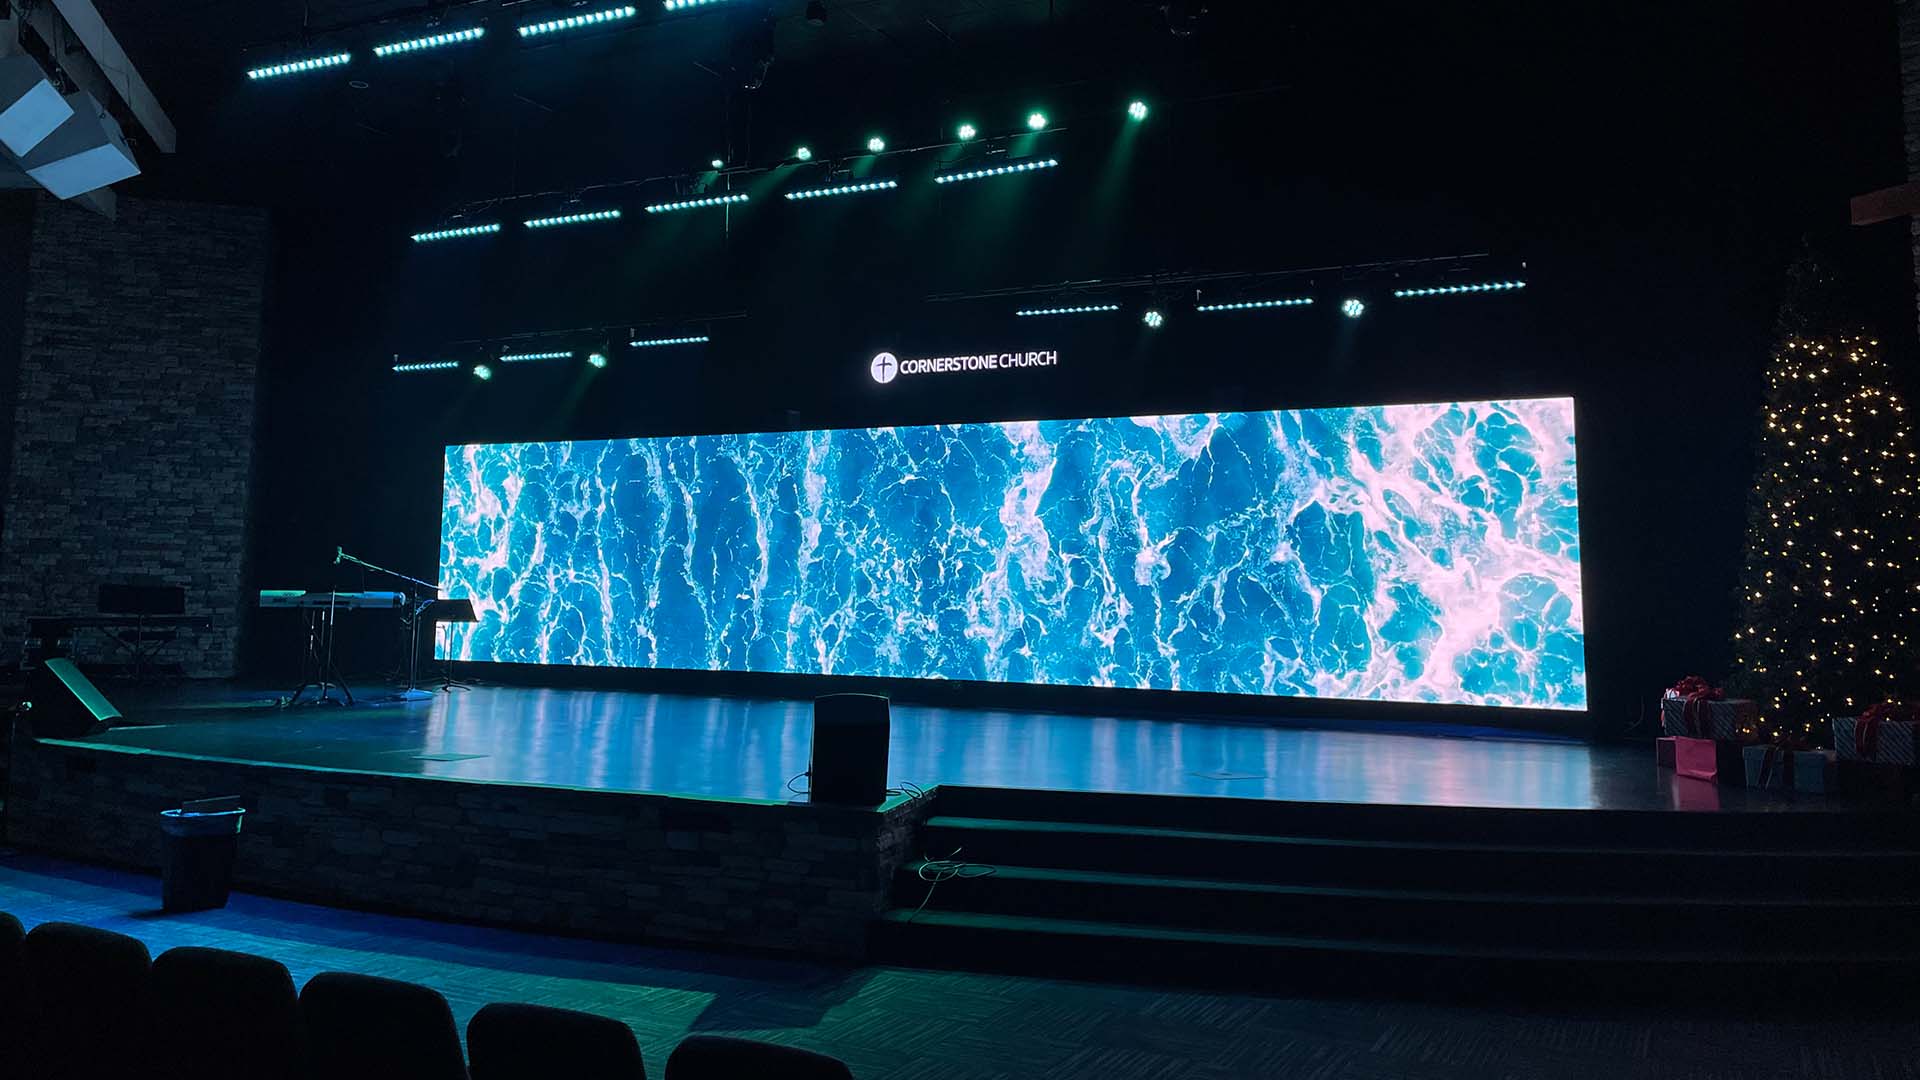
An indoor LED display should prioritize close-range readability, comfortable dimming, reflections, ventilation, and access for repairs. Meeting rooms and control rooms often need finer detail than retail signage, even when both screens are indoors.
3.2 Outdoor installations
An outdoor LED display needs a configuration approved for its sunlight, moisture, temperature, and mounting conditions. Confirm the protection of the installed assembly, including connectors and exposed rear surfaces. A bright indoor cabinet is not automatically suitable outside.
| Specification | Indoor project | Outdoor project |
|---|---|---|
| Image quality | Test small text and dimmed image quality | Test content in the actual daylight conditions |
| Environment | Confirm room temperature, dust, ventilation, and humidity | Confirm weather exposure, temperature range, and enclosure ratings |
| Structure | Check wall or support loads and maintenance space | Include wind assessment and location-specific structural requirements |
| Power | Plan circuits, grounding, and operating schedule | Add appropriate protection for exposed electrical components |
3.3 Confirm the site before requesting quotations
Start with a one-page brief. Record the available wall width and height, nearest and farthest viewers, daily operating hours, ambient light, mounting position, and content sources. Include the smallest text people must read and whether cameras will film the screen. Photographs of the room and access route help suppliers identify practical constraints.
A conference-room LED display must make presentations readable from the front row. An outdoor advertising screen needs suitable daylight performance and weather protection. A touring system must survive repeated handling. These projects require different designs even when the visible screen area is identical.
4. How to Choose the Right LED Display Size
4.1 Measure the usable installation area
Measure the available width and height, sightlines, service clearances, and delivery route. Keep doors, ventilation, and access equipment in the plan. Specify active screen dimensions separately from the supporting structure and trim.
4.2 Match size and aspect ratio to content
Choose the shape around the content that matters most. A 16:9 screen can suit standard video and presentations; unusual advertising formats require content designed for their proportions. Check the farthest viewer as well as the closest seat, and verify that important text remains readable.
4.3 Calculate native resolution
For an LED display with square pixels, divide each active dimension in millimeters by the actual pixel pitch:
Horizontal pixels = active width (mm) / pitch (mm)
Vertical pixels = active height (mm) / pitch (mm)
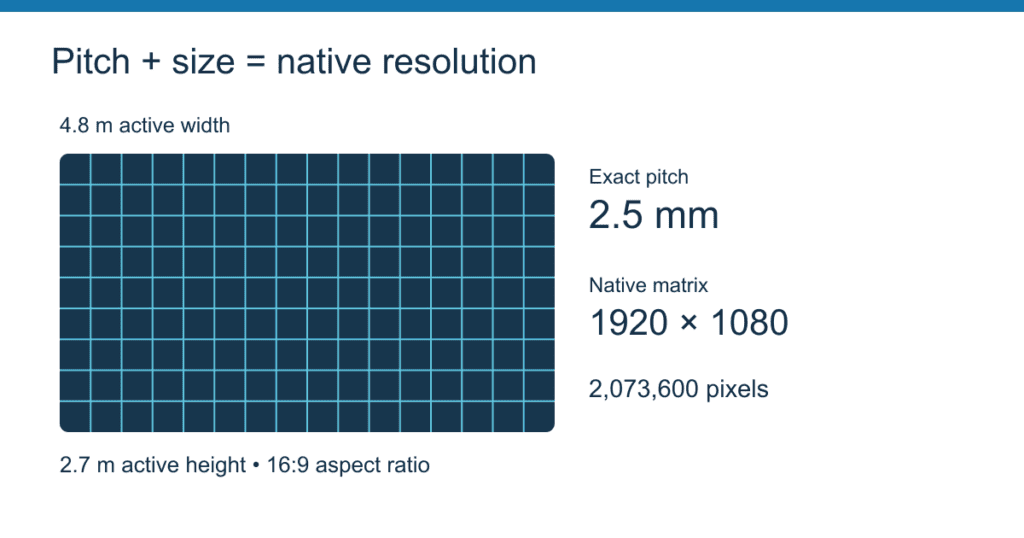
For a theoretical 4.8 m by 2.7 m wall at exactly P2.5, the calculation is 4,800 / 2.5 = 1,920 pixels wide and 2,700 / 2.5 = 1,080 pixels high. Total resolution is 2,073,600 pixels, and area is 12.96 m². This matches a 1920 × 1080 source when the signal mapping also matches.
The same footprint at exactly P1.25 would contain 3840 × 2160 pixels. That is four times the pixel count, not a guaranteed fourfold price or power increase. Confirm the real cabinet matrix: modular dimensions may require an adjusted width or height, and nominal pitch labels can be rounded.
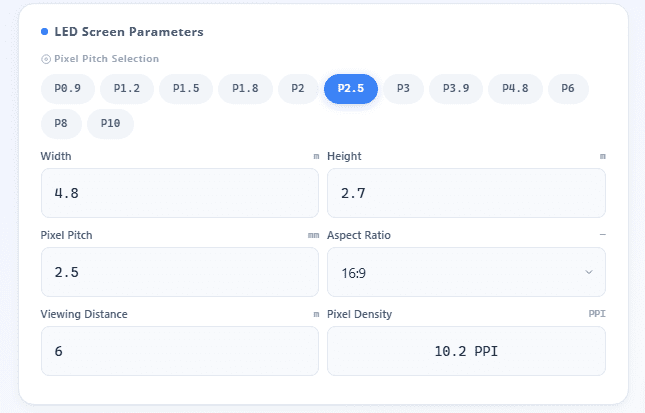
Enter measured dimensions and viewing distance before comparing candidate pitches.
Use the LED pixel pitch calculator to compare scenarios. Treat its viewing recommendations as screening estimates and verify the final LED display with a demonstration. Native resolution, input resolution, and controller capacity are separate specifications.
5. How to Choose the Right LED Display Pixel Pitch
5.1 Use viewing distance to shortlist pixel pitches
Pixel pitch is the center-to-center spacing between adjacent pixels, measured in millimeters. P2.5 means a nominal 2.5 mm spacing. A smaller pitch increases pixel density at a given physical size; it does not automatically make every project a better investment.
Planar’s pixel-pitch guidance distinguishes visual-acuity distance from average comfortable viewing distance. The latter is subjective and depends on eyesight and content. For an LED display shortlist, use these references to select candidates, then compare them using your actual presentations or video.
| Pixel pitch | Average comfortable distance | Visual-acuity distance |
|---|---|---|
| 1.25 mm | 2.15 m | 4.30 m |
| 1.50 mm | 2.58 m | 5.16 m |
| 2.00 mm | 3.44 m | 6.88 m |
| 2.50 mm | 4.30 m | 8.60 m |
| 4.00 mm | 6.88 m | 13.75 m |
Source: selected rows from Planar’s reference table. These are planning estimates, not guaranteed readability distances or mandatory minimums.
If the nearest seats are 3 m away, request a side-by-side demonstration of candidate pitches rather than treating “pitch in millimeters equals distance in meters” as a universal rule. Small spreadsheet text can require a finer pitch than large promotional graphics at the same distance.
5.2 Confirm the final pitch with a demonstration
Shortlist two or three pitches that meet the distance and resolution requirements. Request identical content at the same size and operating brightness. Compare fine text, diagonal lines, gray gradients, and faces from the intended seating positions.
Buyer takeaway: Pay for the detail your audience can use. The smallest pitch is a specification choice, not a substitute for a viewing test.
6. What Brightness and Image Quality Does an LED Display Need?
6.1 Match brightness to the actual lighting
Brightness is measured in nits, equivalent to cd/m². Compare an LED display at its intended operating brightness, not only at maximum output. Ask for a daylight demonstration outdoors and a dimmed demonstration in meeting rooms. Check reflections, readable contrast, and skin tones with your own content.
There is no single brightness number that suits every indoor or outdoor location. A shaded entrance differs from a sun-facing facade. Request the rated and calibrated brightness, dimming method, operating-temperature limits, and power consumption at the selected setting. Plan automatic or scheduled dimming where lighting changes.
6.2 Test refresh rate with the camera you will use
Do not confuse an LED display refresh specification such as 3840 Hz with a 60 fps video signal. Refresh describes the panel’s driving behavior; frame rate describes incoming image frames. A larger refresh number alone does not guarantee clean camera footage.
Brompton Technology’s ShutterSync documentation explains why camera shutter timing and panel refresh must work together. For livestreams, test the intended camera, frame rate, shutter setting, brightness, and processor configuration before purchase. Record both moving subjects and a static gray image to check banding, flicker, and scan artifacts.
Moiré is a separate interaction between the camera sensor and screen pixel pattern. Adjusting camera position, focus, lens, and framing may be necessary even when refresh synchronization is correct.
6.3 Verify packaging and controller compatibility
For an LED display using SMD, COB, or a protective surface coating, compare the complete product rather than assuming the technology label guarantees performance. Ask about impact resistance, reflection, color consistency, module replacement, and repair turnaround. A robust surface is useful only if damaged sections can be serviced within your operating schedule.
The LED display controller must support the total pixel load, output mapping, required inputs, frame rate, and bit depth. Verify receiving-card compatibility, cable distances, redundancy, and software access. Never infer output capacity from an HDMI input label alone; request a documented system diagram for the proposed configuration.
7. LED Display Rental vs Buying
7.1 When renting makes sense
For a one-off event, compare a complete rental package with the ownership costs of an LED display. Confirm delivery, installation, operator support, teardown, and backup equipment in writing. Rental avoids the need to store and maintain equipment between infrequent events.
7.2 When buying makes sense
Buying can suit a permanent installation or repeated commercial use when utilization justifies the investment. Include transport, crew, storage, repairs, software, and spare parts in the ownership calculation. There is no universal event count or payback period that applies to every buyer.
| Decision factor | Renting | Buying |
|---|---|---|
| Upfront commitment | Pay for the agreed event or hire period | Fund equipment and installation |
| Maintenance | Confirm provider responsibilities in the contract | Arrange in-house support or a service agreement |
| Availability | Reserve the required specification and dates | Control access to the equipment you own |
| Best fit | Occasional events or temporary demand | Permanent operation or planned repeat use |
7.3 Check rental cabinet construction
A rental LED display can be purchased outright. Here, rental describes equipment designed for repeated assembly and transport. EagerLED’s H9 series video illustrates its EA500H9 and EA1000H9 cabinet designs, quick locks, corner protection, and service access. Use these features as inspection points when comparing the exact models in your quotation.
Official EagerLED product animation: H9 series cabinet construction for stage and event use. Watch on YouTube.
8. LED Display Cost Guide
8.1 Separate screen price from installed project cost
An LED display price per square meter is useful only when suppliers quote equivalent specifications and inclusions. Record the currency, quotation date, delivery terms, taxes, warranty scope, and whether controllers, receiving cards, cables, or power supplies are already included. This prevents both omissions and double counting.
| Budget item | What to include | What to ask the supplier |
|---|---|---|
| Screen hardware | Cabinets, modules, and included electronics | What exact bill of materials does the unit price cover? |
| Control and playback | Processor, player, licenses, and required backup equipment | Which inputs and pixel loads are supported? |
| Installation | Structure, electrical work, data cabling, access equipment, labor | Is a site survey included, and who owns each task? |
| Logistics | Packaging, freight, insurance, customs, and applicable taxes | Which delivery terms and destination are assumed? |
| Commissioning and support | Calibration, training, spare parts, and service visits | What is covered after acceptance? |
| Operation | Electricity, cooling where required, maintenance, and software fees | What assumptions support the running-cost estimate? |
Installed budget = screen hardware + non-included control equipment + installation + logistics + commissioning. Add an explicitly identified contingency based on the uncertainties in your own site survey.
For a calculation example only, assume a supplier quotes USD 1,000/m² for the 12.96 m² wall above. Screen hardware would be USD 12,960. If separately quoted installation and other non-included items total USD 6,000, the subtotal becomes USD 18,960 before applicable taxes or contingency. These assumed inputs demonstrate the arithmetic; they are not a market price, an EagerLED offer, or a binding quotation.
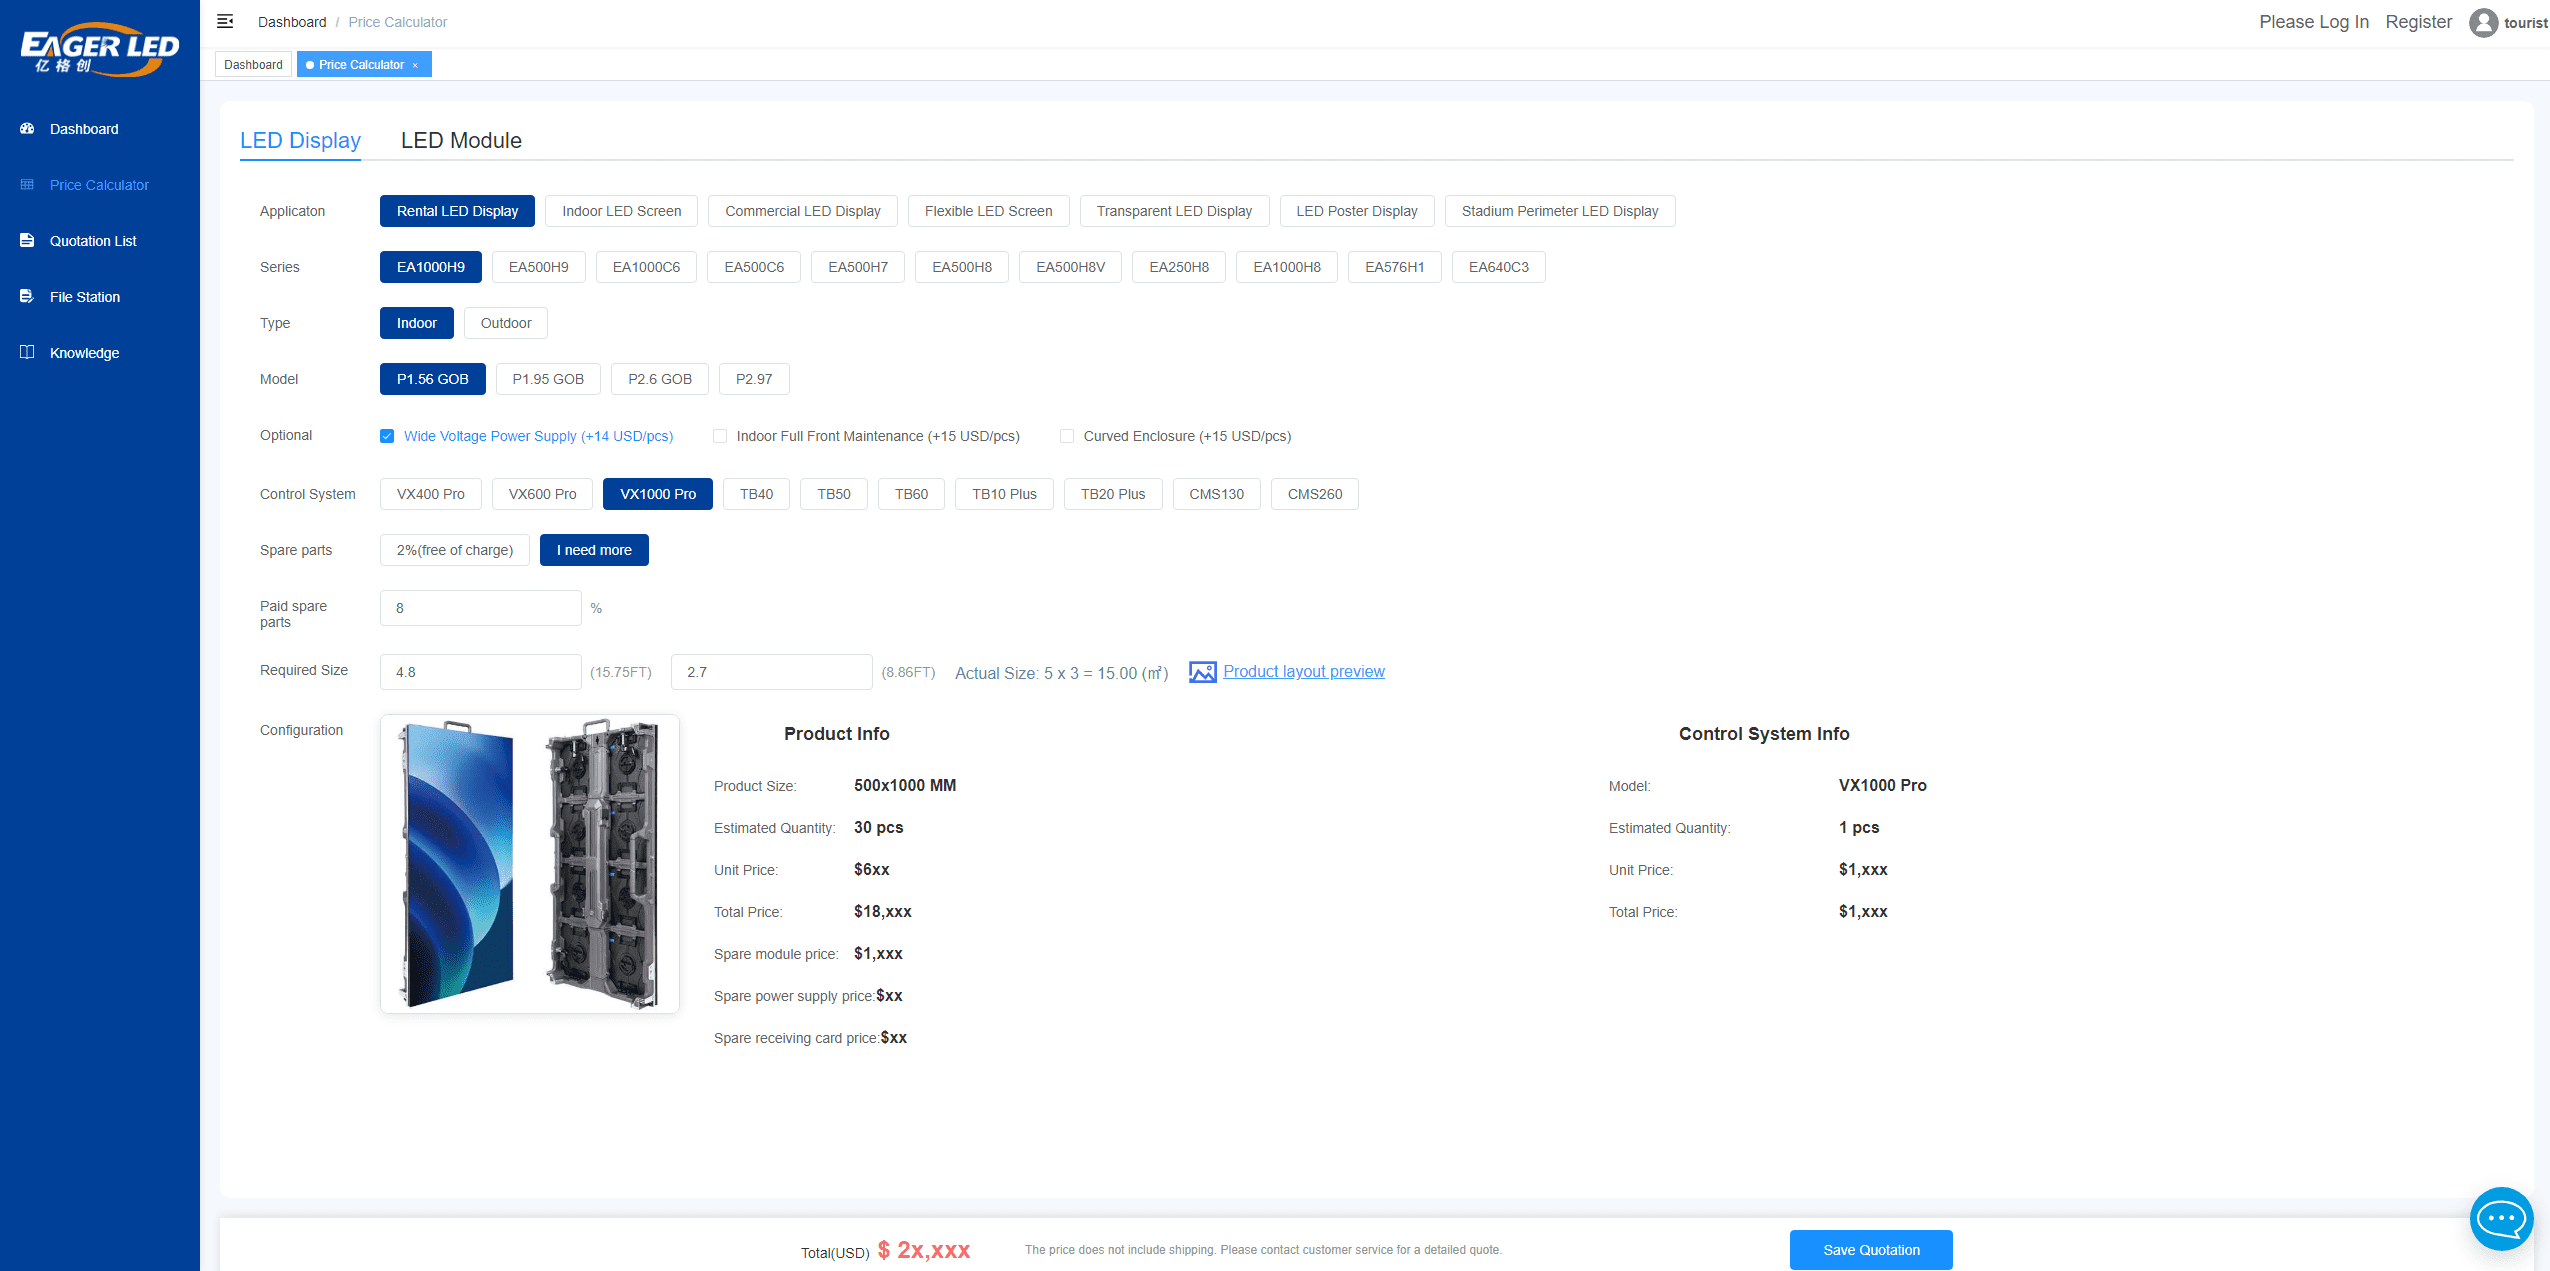
Review the configuration and accessory scope behind a quotation, then add site-specific costs.
Start with the LED wall cost calculator for a configuration estimate; account access may be required. Use the installation cost guide to prepare questions about structure, power, labor, and commissioning.
8.2 Estimate electricity using realistic operating power
Request both maximum and typical LED display power consumption. Maximum demand helps the electrical designer size the installation; representative operating power is more useful for energy budgeting. Typical power varies with content and brightness, so ask how it was measured.
Daily energy (kWh) = area (m²) × average power (W/m²) × hours per day / 1,000.
Using assumed inputs of 12.96 m², 200 W/m², and 10 hours daily gives 25.92 kWh per day. At an assumed USD 0.15/kWh, that is approximately USD 3.89 daily or USD 1,419 annually over 365 days. Add controller, cooling, and other ancillary energy where applicable. Replace every assumption with supplier measurements, your schedule, and the local tariff.
9. How to Plan LED Display Installation
9.1 Confirm enclosure protection and structural requirements
For an outdoor LED display, ask which surfaces, connectors, and installed assemblies carry the claimed IP rating. The IEC ingress-protection guide defines IP65 as dust-tight and protected against water jets. It does not certify immersion resistance, corrosion resistance, wind capacity, or the complete installation.
Have qualified local professionals assess support loads, wind exposure where relevant, electrical protection, grounding, and applicable permits. Obtain drawings showing mounting points, ventilation space, and cable entry. Follow the manufacturer’s installation instructions; a blog checklist cannot replace a project-specific structural or electrical design.
9.2 Specify service access before the screen is ordered
A front-service LED display can suit a wall with no rear maintenance corridor, but confirm that modules, power supplies, and receiving cards are all accessible as required. Rear-service designs need a usable access route. Check whether technicians can reach every cabinet without removing unrelated equipment.
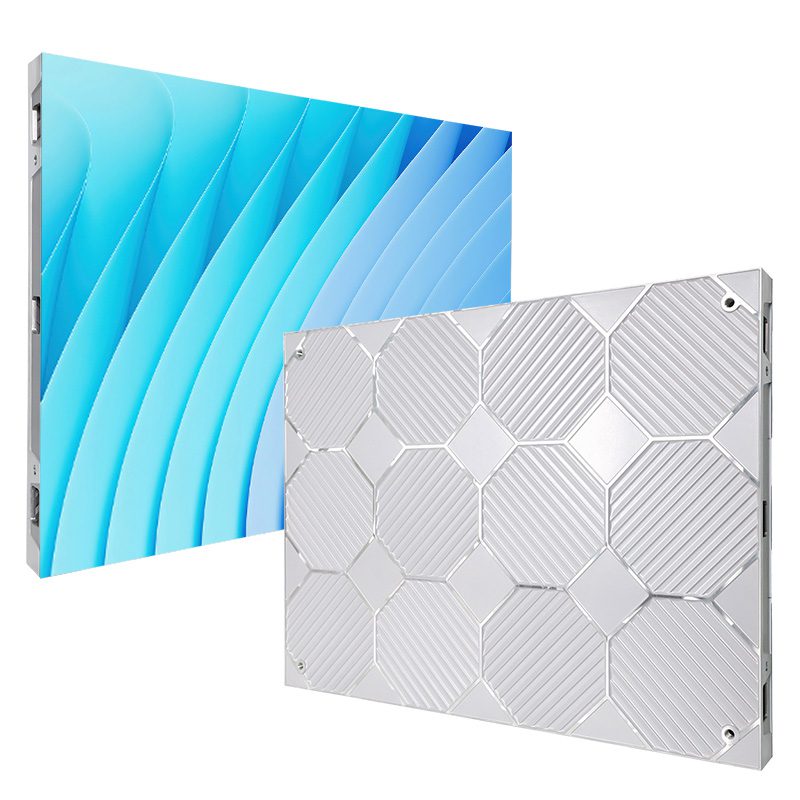
Cabinet service design is a procurement requirement. Confirm access for each replaceable component.
Ask which spare modules, power supplies, and receiving cards to keep on site, whether matching production batches are available, and how calibration data is restored after replacement. Agree cleaning methods and inspection intervals with the supplier. Warranty length alone does not establish the practical service life of an LED display.
9.3 Review the installation method before ordering
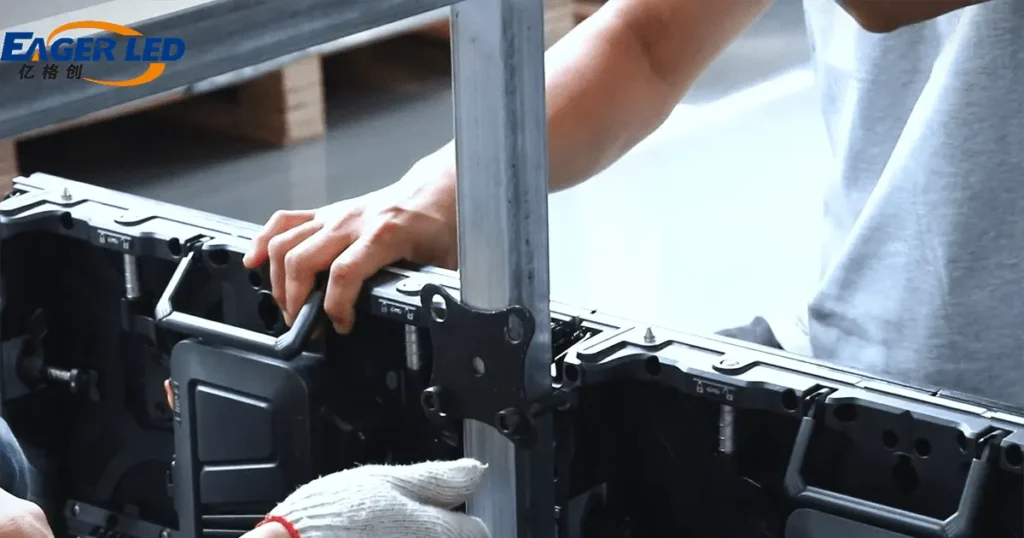
Request a model-specific installation plan covering the support system, cabinet connections, cable routing, service access, and commissioning sequence. The following official video demonstrates bracket installation for EagerLED’s EA960R4. Review the hardware arrangement with your installer; this example does not establish the structural design or electrical requirements for another project.
Official EagerLED installation demonstration: EA960R4 cabinet and bracket assembly. Watch on YouTube.
10. How to Compare LED Display Suppliers
10.1 Request like-for-like quotations
Send the same LED display brief to each shortlisted supplier. Request exact models, native resolution, cabinet count, weight, calibrated brightness, controller configuration, service access, delivery scope, and spare-parts provision. Ask for references from projects with a similar environment and maintenance model.
Check the documents applicable to your destination and product configuration. An unspecified certificate logo does not prove that the quoted assembly meets local requirements. Confirm who will provide technical support, what parts and labor the warranty covers, and who pays return freight or site visits.
10.2 Agree acceptance tests before paying the balance
Put measurable acceptance criteria in the order. Use supplier-agreed tolerances rather than inventing universal limits for brightness uniformity, defective pixels, or cabinet flatness.
- Confirm delivered models and quantities against the approved bill of materials.
- Inspect cabinets, locks, cables, and visible damage before installation.
- Display solid colors, gray ramps, and your smallest required text.
- Check module color matching and readability at the intended brightness.
- Test every required input, layout, backup path, and camera configuration.
- Receive configuration backups, calibration files, manuals, and operator training.
Save the test results and configuration files with the quotation. This creates a clear record of the LED display you approved and makes later fault diagnosis easier.
10.3 Technical sources and calculation notes
This guide combines published technical references with explicitly labeled planning examples. Product capabilities must be checked against the exact model quotation and documentation. Sources reviewed on September 8, 2026:
- Planar: What is Pixel Pitch and Why Does It Matter? Definitions and viewing-distance reference values.
- International Electrotechnical Commission: Ingress protection ratings guide. Meaning and scope of IP numerals.
- Brompton Technology: ShutterSync. Relationship between camera shutter timing and panel refresh.
Screen-resolution examples assume exact pitch and active dimensions; final designs require whole modules and cabinets. Budget and energy calculations use disclosed hypothetical inputs and do not represent measured performance or a customer installation. LED Display Price is an EagerLED platform offering product information and quotations; compare alternatives against your own requirements.
11. FAQ
11.1 What is the best pixel pitch for an LED display?
The best pitch meets your nearest-viewer and content requirements within budget. Measure the closest viewing position, calculate native resolution, and compare sample panels with real content. Do not select a pitch using room size alone or assume the smallest available pitch is always necessary.
11.2 How much does an LED display cost?
There is no reliable universal price without a configuration and project scope. Compare screen area, pitch, enclosure design, controller, installation, freight, and support. Ask for a dated itemized quote; the worked figures in section 8 are calculation examples, not current market offers.
11.3 Can an indoor LED display be used outdoors?
Only when the manufacturer explicitly approves the intended outdoor conditions and installation method. Brightness alone does not establish suitability. Confirm enclosure protection, temperature range, moisture exposure, connectors, and the structural design before using any LED display outside.
11.4 Is 3840 Hz enough for filming?
That number alone cannot answer the question. Camera shutter timing, frame rate, panel driving, brightness, and synchronization affect the result. Test the exact screen and camera combination. If filming is critical, require a successful camera test as an acceptance condition.
11.5 Should I buy or rent a screen?
For a one-off event, compare a complete rental package with the ownership costs of an LED display. For repeated use, include storage, transport, crew, maintenance, and expected utilization. The financial decision is separate from whether the cabinets themselves are designed for rental or fixed installation.
12. Conclusion
A suitable LED display starts with a clear brief: location, viewing distance, content, screen area, and operating schedule. Use those requirements to shortlist pixel pitches, confirm native resolution, and test image quality under realistic conditions. Compare complete project costs, including installation and ongoing service, before choosing a supplier. Keep the approved specification, acceptance results, and configuration backups together. For your next step, prepare the measurements and use the calculator to build a preliminary configuration, then request an itemized quotation and a demonstration. That process turns an attractive screen price into a purchase you can evaluate and maintain with confidence.