
2026-10-27T13:29:34+00:00October 27, 2026|
2026-10-27T13:23:03+00:00October 27, 2026|
2026-10-27T13:12:56+00:00October 27, 2026|
Recessed LED wall service access means a technician can reach and replace the specified display components after the wall is finished. A front-service cabinet can make a shallow wall opening possible, but “front service” alone does not prove that every cable, power unit, mounting fastener, or junction box remains reachable. The actual removal path and surrounding construction must be reviewed together.
For an AV integrator planning a corporate lobby, the right time to test that claim is before framing and millwork are finalized. Ask the display supplier for a model-specific service sequence, component map, and installation drawing. Coordinate these with the architect and qualified structural and electrical trades. The finished opening must support normal use and a realistic repair, not just the first installation.
Recessed LED wall service access is component specific
Ask which items can be removed from the viewing side: LED modules, power supplies, receiving electronics, cabinets, and inter-cabinet connections. A product may offer front module removal but still place a connection, latch, or power assembly where a technician needs another route. Conversely, some systems are designed for broader front access. Only the exact model and version can settle the scope.
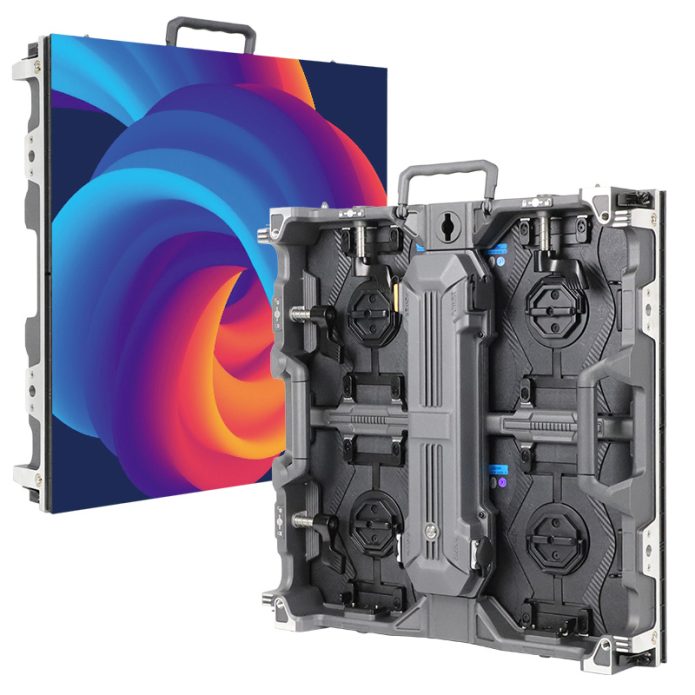
The site’s EA250WH5 product page identifies a front-access design. That supports considering it for a shallow installation; it does not provide a universal recess dimension or a site-specific structural approval. Planar also describes front-service systems as reducing space behind a video wall, but those statements concern Planar’s own models. Neither claim should be transferred to an unrelated cabinet without its drawings.

A usable service path also depends on what happens after a module is released. The part must be supported, disconnected using the approved method, and brought clear of trim without striking adjacent finishes. The supplier should identify any special tool and the space needed to use it. A flush aesthetic detail that blocks the tool or traps the first module defeats the intended access even if the cabinet itself is called front service.
Design the opening around the real assembly
Start with the active image dimensions and cabinet grid, then request the external cabinet envelope, mounting hardware, trim, and service allowances. Active pixels do not describe the physical space needed for a frame, connection bend, or finishing tolerance. Do not copy a cavity dimension from a different pitch or cabinet version. Coordinate the final opening with the manufacturer drawing and the building team’s approved tolerances.
Keep the mounting concept separate from the finish detail. The wall or support frame must be designed for the actual equipment loads, attachment pattern, building substrate, and local requirements by qualified professionals. A shallow cabinet does not mean the drywall or decorative panel alone can carry it. The integrator should show where the load goes and which fasteners must remain accessible during future service.

For a recessed LED wall service access review, draw the display plane, structural frame, finish face, trim, nearby doors, and ceiling or floor constraints in section as well as elevation. Mark which piece is removed first and where it moves. If an edge cabinet requires sideways clearance, a tight return wall may prevent removal. If the design depends on removing trim, identify how it is fastened and whether it can be reused without damaging the finish.
Keep power, data, and heat paths maintainable
Display service is more than LED modules. Identify where power distribution, data distribution, controls, disconnects, and cable junctions will be located. A processor in an equipment rack may be easy to reach, while a junction hidden behind sealed millwork is not. Ask the electrical designer and display supplier to coordinate cable routing, bend allowances, separation, and access to the actual installed connectors.
Do not assume that a front-service screen can be enclosed without considering thermal behavior. Heat rejection and airflow depend on the equipment, brightness setting, duty cycle, wall geometry, and local environment. Obtain the model’s installation guidance and design the cavity or ventilation accordingly. Avoid inventing a generic clearance number; the approved assembly and any building or fire requirements determine what is acceptable.
Plan the service environment too. A lobby wall may sit behind furniture, a reception counter, glazing, or security barriers. Recessed LED wall service access should be demonstrated with those obstacles in place. Document who can isolate the equipment, what protection is needed for surrounding finishes, and how service will be scheduled without treating this article as an electrical procedure.
Compare designs by repairability, not profile alone
A deeper cavity is not automatically the better design, and a thinner cabinet is not automatically serviceable. Use the following matrix to discuss constraints before procurement. Each option still requires the selected product’s approved drawing and a site-specific design.
| Concept | Potential benefit | Service question | Design evidence |
|---|---|---|---|
| Shallow front-service recess | Can preserve floor space and a near-flush finish. | Can every specified component and tool clear the finished trim? | Model-specific removal sequence and section drawing. |
| Accessible rear cavity | May simplify access to rear-mounted connections and assemblies. | Is a safe, usable route available for staff and replacement parts? | Access layout, equipment locations, and approved support design. |
| Surface-mounted display | May avoid some cavity conflicts in an existing wall. | How are edges, cables, support, and visible depth handled? | Elevation, cable path, structural review, and finish detail. |
The wider installation-cost guide explains why structure, power/data work, labor, and commissioning should be priced separately. In a recessed project, the service opening and removable finish can change those items. Ask bidders to describe the same finished design and service scope so a lower display-only quote does not hide unresolved construction work.
Demonstrate the service path before handover
Ask the supplier and installer to walk through a representative repair on the approved mock-up or installed wall, using the actual tool and replacement component. Recessed LED wall service access is demonstrated by that real removal path, not by a label on a brochure. Record the part removed, the order of steps, any finish removed, and whether the display returns to its accepted image. Qualified personnel should perform the work under the manufacturer procedure.

Keep an as-built cabinet map, component identities, connection plan, approved drawings, configuration backup, and service contact with the owner. Recessed LED wall service access can be lost later when furniture, signage, or architectural trim changes. State any keep-clear zone or removable element in the handover documents so future facilities teams know what must remain available.
Frequently asked questions
Does front service eliminate the need for a rear door?
It may, if the specified system and every required service task are truly accessible from the front and the approved design permits it. Verify the component scope, utilities, and local requirements; do not decide from the product label alone.
Can a screen be installed flush with finished millwork?
A near-flush appearance may be possible, but the exact offset, trim removal, tool clearance, support, and thermal arrangement depend on the selected product and site. Request a coordinated section drawing before approving the finish.
What if the wall opening is already built?
Survey the actual opening and obstacles, then compare them with a model-specific assembly drawing. The solution may involve a different cabinet, a revised support or trim detail, or another mounting concept. Do not assume that a smaller module alone fixes an inaccessible cavity.
Send drawings before construction closes the wall
Provide the installation country, proposed screen size, lobby lighting and viewing distance, wall section, finish thickness, support material, nearby obstacles, and equipment location. Identify which service tasks must be possible without opening the rear wall. Ask EagerLED to review the proposed cabinet and access plan, then have the project team approve the final structural, electrical, thermal, and finish details before framing is closed.