
November 5, 2026|
November 5, 2026|
November 5, 2026|
An LED wall site survey should turn a room into a documented quotation brief. Record the usable display envelope, viewing positions, support conditions, service access, power and signal routes, delivery restrictions, and the people responsible for approving each item. Measurements alone are insufficient: the supplier also needs to know which observations are confirmed, which are assumptions, and which require a local specialist’s decision.
This guide is for project contractors preparing an indoor fixed-installation inquiry. It explains how to collect evidence that makes proposals easier to compare and changes easier to manage. The dimensional example is hypothetical; product images are references, not photographs of a survey or proof that a particular building can support a screen. Electrical and structural design require the appropriate qualified professionals for the project location.
1. Start the LED wall site survey with a decision brief
The first deliverable of the LED wall site survey is a shared description of what the installation must do. Name the room, intended audience, content, operating hours, and decision date. A reception display running scheduled video has different source and approval needs from a meeting room showing spreadsheets and live presentations. Identify the person who owns the display after the installation team leaves.
Bring a tape or laser distance meter, a floor-plan copy, a camera, and a consistent record sheet. Use equipment appropriate to the work and site rules. These tools document accessible conditions; they do not establish concealed wall construction, electrical capacity, or structural suitability. Arrange specialist access when those questions affect the design.
Give the LED wall site survey a revision number and visit date. Label photographs so another person can locate the measurement: for example, room north wall, proposed left edge, or control desk route. Include units on every dimension. Record whether a number was measured directly, taken from an existing drawing, supplied by the building team, or estimated.
| Record | Evidence to collect | Decision it supports |
|---|---|---|
| Room and use | Named room, normal content, operating owner, seating or standing positions | Which viewing and input conditions the proposal must address |
| Display envelope | Dimensioned elevation and section, obstructions, reference datum | Which cabinet arrangements can be considered |
| Building interfaces | Available support information and proposed power, data, and mounting handoff points | What specialist confirmation and local work remain necessary |
| Service and delivery | Removal route, working area, packed-item route, building restrictions | Whether the equipment can arrive and remain maintainable |
| Open-item register | Question, owner, required evidence, deadline, affected quote line | Whether the quotation is ready for approval or remains conditional |
For a preliminary discussion, incomplete information can be useful if clearly labeled. For manufacturing approval, the same unknown may become a hold point. Agree these stages with the supplier rather than treating every early sketch as a final specification.
2. Measure the usable envelope, then test a cabinet layout
Measure the available space at the intended display plane, not just the decorative opening visible from the room. Record width at more than one height, height at more than one position, depth, and nearby obstructions. Identify skirting, ceiling features, doors, sprinklers, sensors, furniture, and any trim that reduces the usable space. A photograph without scale cannot resolve these conflicts.
Keep three boundaries distinct in the LED wall site survey: the active image, the complete display assembly, and the surrounding building opening. The assembly can include support, adjustment space, cables, trim, and access provisions. Ask for a coordinated drawing showing all three. Do not assume the advertised cabinet depth equals the finished installation depth.
01. A worked dimensional example
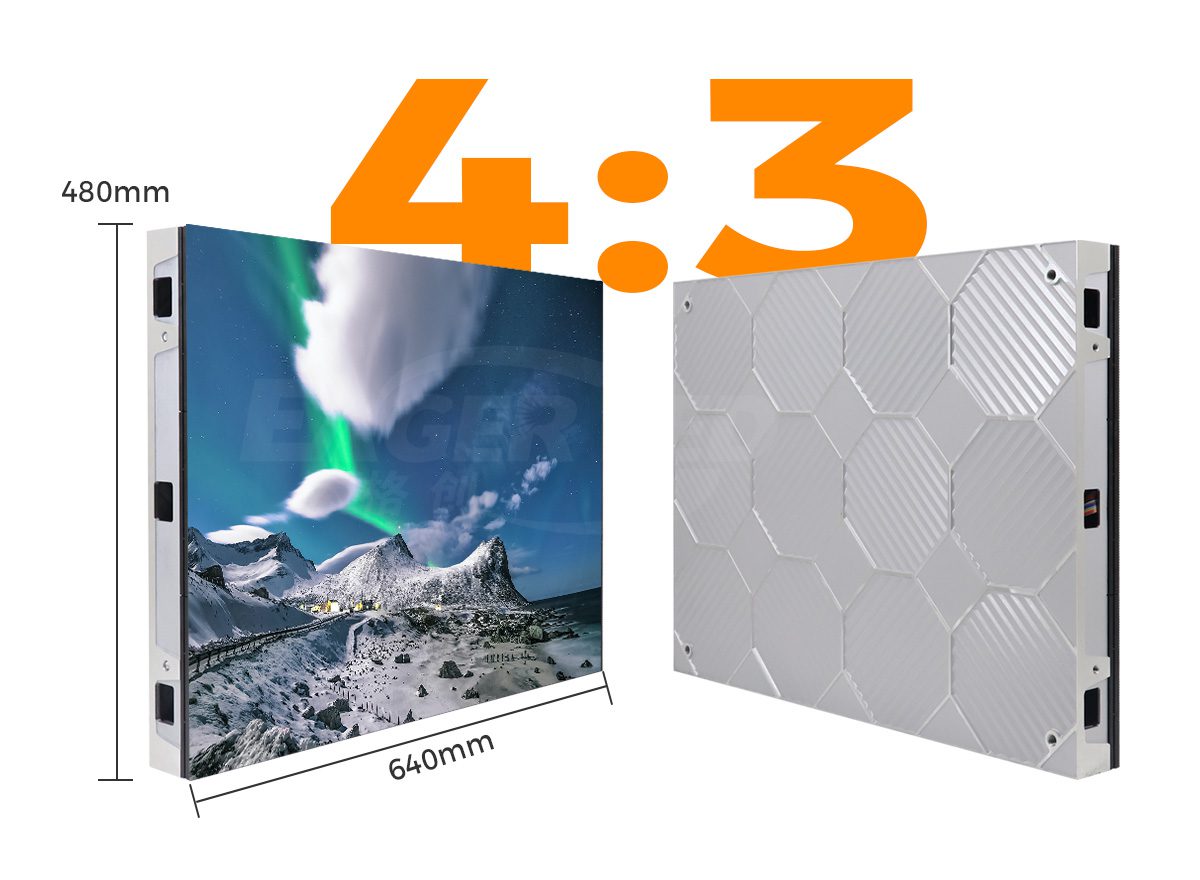
Suppose a measured opening is 4.60 m wide by 2.60 m high, approximately 15.1 ft by 8.5 ft. For arithmetic only, consider nominal 640 × 480 mm cabinets, approximately 25.2 × 18.9 in. EagerLED’s published EA640F2 product page identifies this cabinet format. The example checks a rectangular grid; it does not approve mounting clearances or establish the exact lit aperture.
| Check | Calculation | Interpretation |
|---|---|---|
| Seven columns, five rows | 7 × 0.640 = 4.480 m; 5 × 0.480 = 2.400 m; 35 cabinets | The nominal grid is smaller than the opening |
| Unallocated opening dimensions | 4.600 − 4.480 = 0.120 m; 2.600 − 2.400 = 0.200 m | These totals are not approved service or installation clearances |
| Nominal grid area | 4.480 × 2.400 = 10.752 m², about 115.7 ft² | Confirm actual image area before using a price-per-area figure |
| Another full column or row | 8 × 0.640 = 5.120 m; 6 × 0.480 = 2.880 m | Either change exceeds the assumed opening |
| Canvas shape | 4.480 ÷ 2.400 = 1.867, compared with 1.778 for 16:9 | Content fitting needs a decision even though the grid physically fits |
If centered geometrically, the unused width would be 60 mm per side and the unused height 100 mm at top and bottom. Those numbers do not establish what the design needs. An offset installation, uneven opening, frame, trim, or removal method can change the available space. Have the supplier reconcile the grid with the approved installation section.
02. Capture the audience and content together
Record the closest, typical, and farthest viewing positions, including side seats. Test representative slides or text rather than selecting pitch from distance alone. Small spreadsheet labels, subtitles, and video create different readability demands. Use the site’s pixel pitch calculator guide to explore the relationship, then confirm readability with relevant content.
Add the proposed image height above the finished floor and photograph the view from occupied positions. A suitable pixel pitch cannot correct a sightline blocked by a podium or a display placed above a comfortable viewing position. Keep the chosen layout and the content team’s approved canvas in the same revision package.
Use a common reference for the drawing and photographs. For example, define the left finished opening edge as the horizontal starting point and the finished floor as the height reference. Record whether flooring, cladding, or ceiling finishes are already complete. Where the opening varies, show the limiting dimension and its location instead of reporting only an average. Have a second person check measurements that determine the cabinet order. This is particularly useful when the wall will be fabricated before the installation team returns.
3. Verify support information and the service route
A completed LED wall site survey identifies the support question and its approving professional. It does not convert a wall photograph into a load-bearing assessment. Collect the available construction information and ask the structural designer to confirm what must be investigated. Include the display, support assembly, attachments, and relevant installation conditions within that professional’s agreed scope.
Obtain the supplier’s weight and interface information for the proposed configuration. Cabinet weight alone does not represent the complete mounted system, and a statement about cabinet material does not prove building suitability. Record who provides the frame drawing, who checks the building connection, and who signs off the installation method.
Service access must describe an actual removal sequence. For front service, identify how a module is reached, removed, handled, and replaced. Then ask how the power supply, receiving card, connections, and other serviceable parts can be accessed. The front-removal label by itself does not answer every maintenance task.
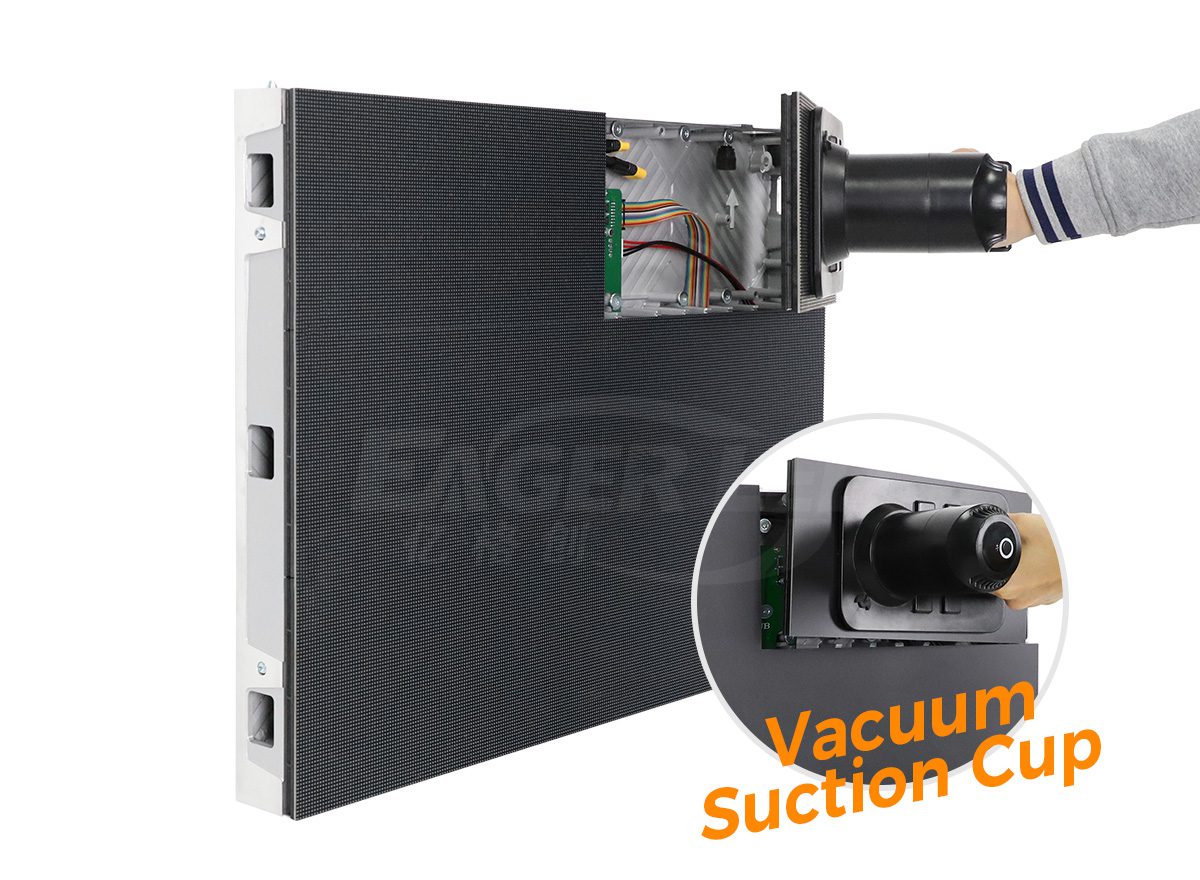
The EA640F2 product information describes front access. Use that as a starting point for a model-specific discussion, then verify the selected configuration and installation details. Check tool movement, safe working space, cable access, and whether surrounding trim can be removed. Avoid assigning a universal clearance to all front-service displays.
For a recessed opening, the LED wall site survey should include a section drawing with the proposed finished face and service path. Read the separate recessed LED wall service access guide for that narrower design issue. Keep storage for compatible spares and tools in the operating plan, with a named custodian.
4. Map power, signal, and the operating environment
Mark the proposed electrical handoff point and control location on the plan. Have the electrical professional confirm the available supply and required distribution from the final equipment information. A nearby socket is an observation, not proof of suitable capacity. Do not select circuit protection or cable sizes from a generic online example.
Request both maximum input requirements and operating-power information, with the conditions stated. The maximum supports a different planning question from an average used for energy budgeting. Ask which loads are included: display cabinets, processing equipment, players, networking, and any separate environmental equipment. Record the boundary so a supporting load does not disappear between quotations.
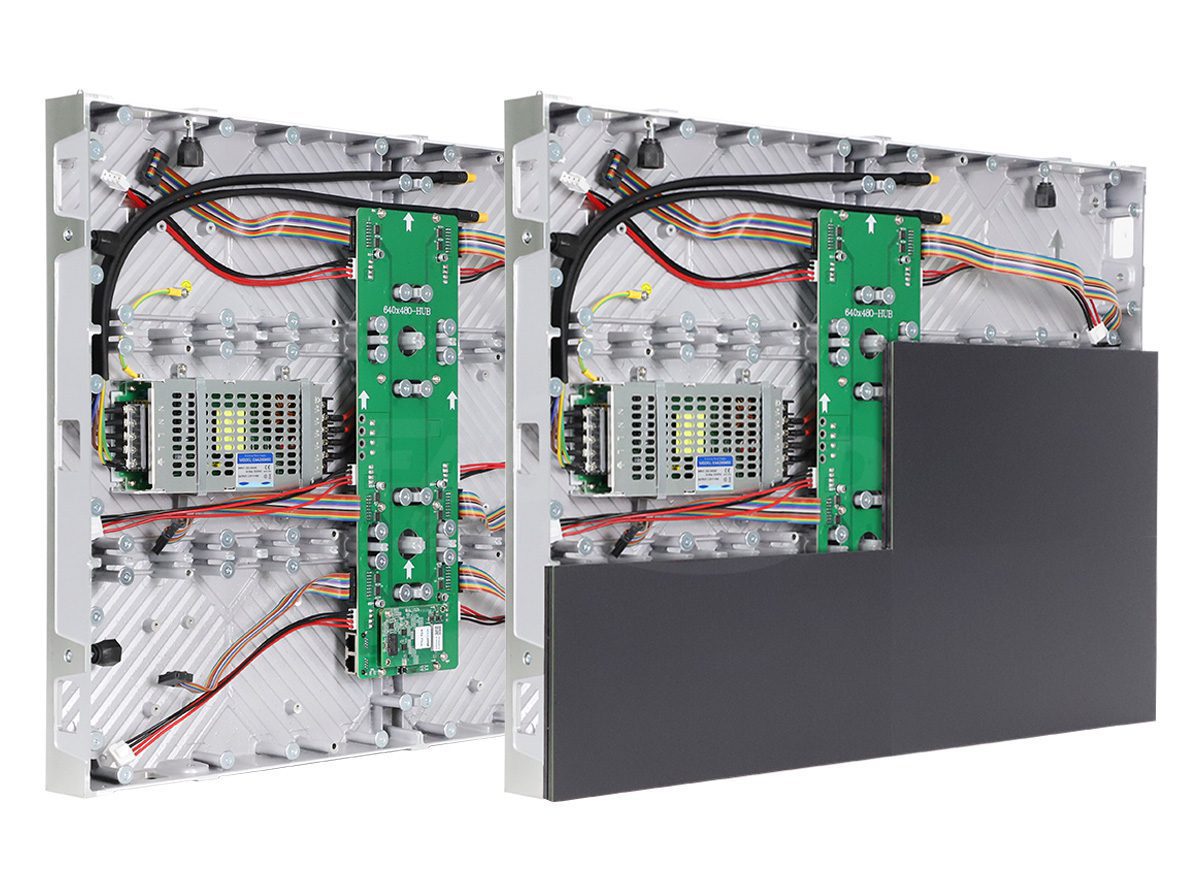
The LED wall site survey should map the physical signal path from each source to the controller and screen. Record route length along the intended cable path, not just the straight-line room distance. Identify containment, access restrictions, entry points, connector space, and any building work needed. Let the system designer select the transmission method for the actual equipment and format.
List source device, connector type, content resolution, frame rate, audio requirements, and required switching behavior. Distinguish a meeting-room input from a remote signage player or an existing AV control interface. Include the operational question: who changes inputs, schedules content, and restores the system after an interruption?
01. Observe light and heat under real operating conditions
Visit when the room is used, or document why the visit is unrepresentative. Record windows, direct light, artificial lighting, planned dimming, operating hours, and nearby heat sources. Photographs can document light direction but should not be treated as calibrated brightness measurements. Ask for image demonstrations under the conditions that matter to the audience.
Do not infer thermal suitability from the word indoor. Record the intended ventilation or environmental-control arrangement and have the responsible designer review heat removal with the final equipment data. Keep intake, exhaust, and service paths consistent with the mounting design. Changes to joinery or enclosure depth may require another review.
If the room is filmed, add camera positions, lens settings, shutter conditions, and a representative recording test to the brief. A successful phone photo from one position does not establish performance for every camera. Treat the test setup as part of the acceptance evidence rather than relying on one headline refresh-rate figure.
5. Survey the route from unloading to the installed wall
Measure the delivery route using the packed equipment and handling method. Individual cabinets may fit through a doorway while a crate, lifting device, or long support member does not. Obtain the packing dimensions and weights for the proposed shipment before approving the route. Confirm the narrowest point, turning space, lift restrictions, and staging area.
In the LED wall site survey, record booking requirements, unloading responsibility, loading-dock availability, work hours, and any restrictions on occupied spaces. These details can affect labor and equipment allowances even when the screen specification stays the same. Ask whether packaging must be removed outside the building and how equipment will be protected during internal movement.
An LED wall site survey also needs a sequence for related trades. Identify when the support, electrical work, data routes, finishes, and access provisions will be ready for inspection. State who verifies readiness before the installation crew travels. A date on a general construction program is less useful than an agreed list of prerequisites with owners.
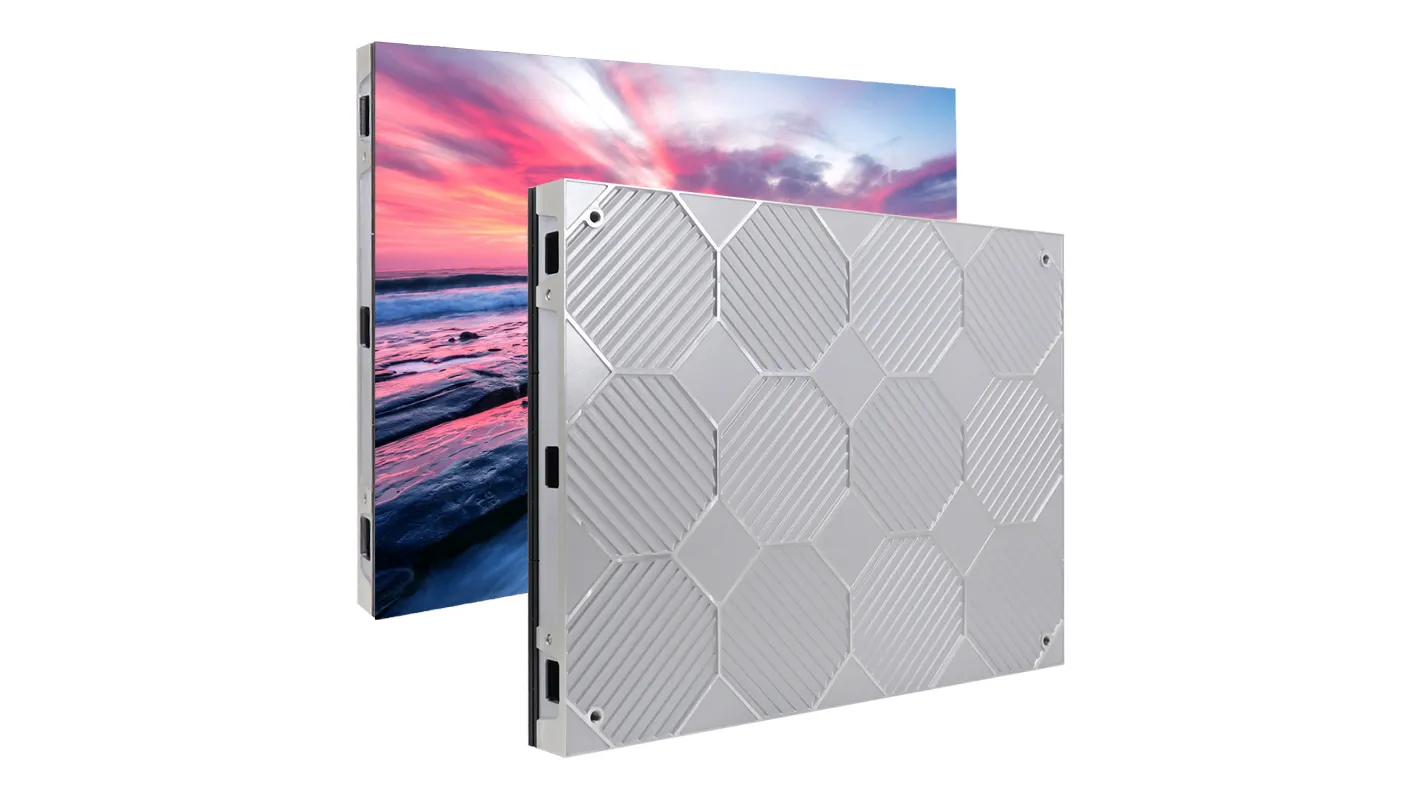
For an occupied venue, agree protection, storage, isolation, and testing arrangements with the building team. If delivery or installation conditions change, update the survey and affected quotation lines. Keep a clear record of who authorized the revised assumption; do not leave a verbal site instruction disconnected from the commercial scope.
Consider the future replacement route as well as the first delivery. A permanent reception desk, security barrier, or new doorway can make a route unavailable after construction finishes. Ask whether a replacement cabinet or service component can still reach the installation without dismantling unrelated building finishes. Record any dependency on removable panels or booked access equipment in the handover information.
6. Convert observations into a quotation and approval record
The useful output of an LED wall site survey is a short, controlled package: measured drawings, labeled photographs, the proposed cabinet and content layout, interface requirements, delivery constraints, and an open-item register. Give every bidder the same revision. Ask for deviations to be listed explicitly rather than hidden in a general statement of compliance.
| Unresolved item | Proposed owner | Evidence needed before approval | Quotation consequence |
|---|---|---|---|
| Final cabinet grid and trim | Supplier and project contractor | Coordinated elevation and section | Screen quantity, finishing, and access scope remain conditional |
| Building support suitability | Appointed structural professional | Project-specific design confirmation | Support and attachment work cannot be treated as settled |
| Electrical distribution | Appointed electrical professional | Equipment load data and agreed handoff scope | Local electrical allowance requires confirmation |
| Packed-item delivery route | Logistics provider and building team | Packing schedule and route review | Handling method and equipment may change |
| Source and content acceptance | AV integrator and operating owner | Agreed source list, canvas, and test conditions | Processing and commissioning scope must match |
Classify each item as confirmed, provisional, or unresolved. Confirmed means the named party has supplied the agreed evidence; it does not mean every participant has merely seen an email. For a provisional item, record the basis and how a change will be handled. For an unresolved item, state the decision needed and the milestone it blocks.
After the LED wall site survey, a practical clarification request names the uncertainty and the required response: identify the drawing revision, confirm whether the stated equipment is included, and explain the effect if the assumption changes. Keep the response beside the relevant quote line. That record is more useful during a later design change than a general assurance that the supplier has allowed for everything.
Use the LED display installation cost guide to organize the resulting budget categories. Keep included work, exclusions, options, and work supplied by others visible. Compare proposals against the same survey revision instead of interpreting a lower total as evidence that the physical work is easier.
Close the loop with an agreed readiness review. Revisit affected records if the room, cabinet model, opening, support, service method, sources, or delivery route changes. The original LED wall site survey remains useful as a baseline, but the quotation and manufacturing package must reflect the current approved conditions.
Frequently asked questions
Can a remote video call replace the first site visit?
It can support an early review if the local team provides reliable dimensions, clear photographs, and the relevant drawings. Concealed construction, electrical conditions, difficult access, or conflicting measurements can still require an on-site specialist. Label the review method and unresolved questions rather than treating a video call as confirmation of every condition.
What if the measured opening differs from the architect’s drawing?
Record both values and identify the drawing revision, measurement location, and finished-surface assumptions. Ask the responsible design team to resolve the discrepancy before freezing the display layout. Do not silently replace an approved dimension or assume that the difference can be absorbed by trim.
Does an LED wall site survey remain valid after the cabinet model changes?
Only the unaffected observations can be carried forward without further review. Recheck dimensions, weight information, interfaces, service method, power data, packing, and any approvals affected by the replacement. Keep the changed model and the resulting document revisions together.
Should sensitive building drawings be included in every inquiry?
Share only the portions needed for the review, following the building owner’s information rules. A marked extract may be sufficient to show the display area, relevant routes, and interfaces. Remove unrelated security or occupancy details and identify who may receive revised documents.
How should survey costs appear in a supplier proposal?
Ask whether the visit, local specialists, travel, drawings, revisions, and later verification are included, optional, or arranged separately. Confirm the deliverables and review stages as well as the fee basis. An initial review and a professional design approval are different scopes and should be described clearly.
Prepare a documented project review with EagerLED
Send the proposed room use, measured elevation and section, viewing positions, source list, service requirements, delivery constraints, and open questions. Include the current revision and distinguish verified information from assumptions. EagerLED can review the proposed display configuration against that brief; local professional approvals should be coordinated through the named project parties.
For your LED wall site survey review, share your project requirements with EagerLED and request a proposal that identifies equipment, interfaces, exclusions, and the information still needed before the configuration is approved.